
WordPress is considered to be the most popular software that is relied on to create websites and it stands out to be the most user-friendly content management system that is currently available. This article is intended to take readers through the steps which will let them manually install and run WordPress on a Linux server.
Read more about it below.
Install WordPress Manually on a Linux Server – Step by Step Guide
- Firstly, there are a few prerequisites that have to be ensured from the users’ end before proceeding to install WordPress on a Linux server – A basic understanding about Linux commands is needed, a Linux system that has admin privilege, and a stable internet connection.
- After meeting these, the next step is to see whether the Linux server is up to date – sudo apt update && sudo apt upgrade -y command ensures that it is up to date.
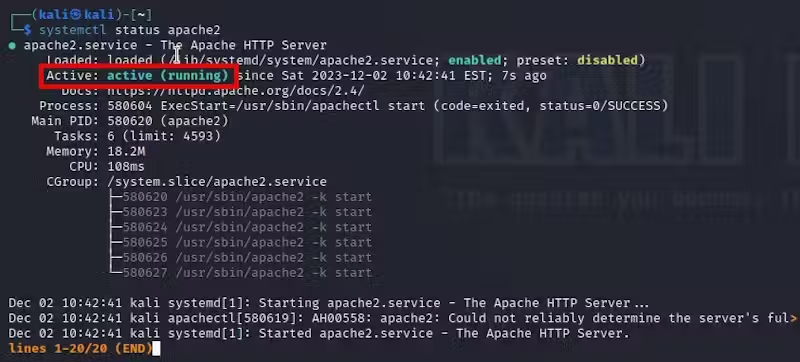
- Next, a web server which will host the WordPress site has to be set up and Apache is said to be the widely-used choice. Use sudo apt install apache2 command to install Apache, and it will thus be serving as the engine behind the WordPress site. With the sudo systemctl enable apache2 command, its service can be enabled.

With the sudo systemctl start apache2 command, the Apache server can be started. The status of the running Apache server can be checked with the Systemctl status apache2 command.
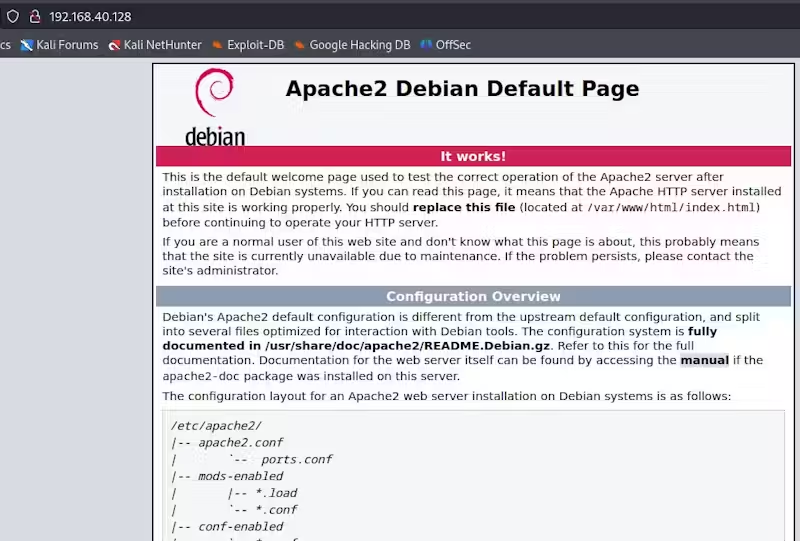
Furthermore, to check local IP address on the browser, use http://server-ip-address.
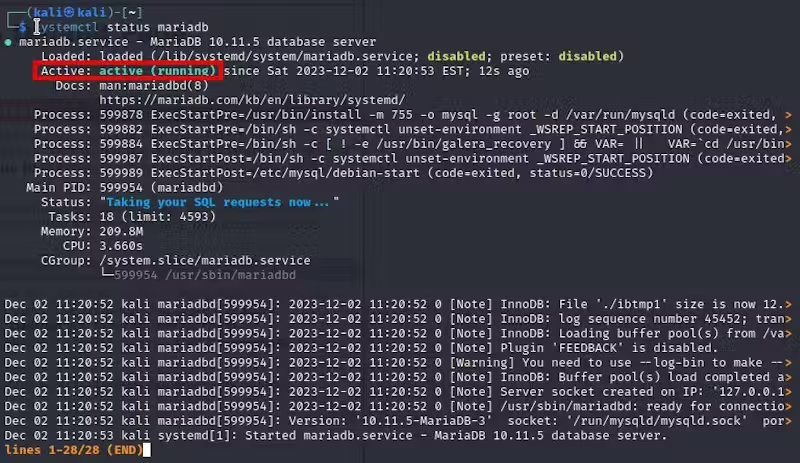
- To store data generated from the WordPress CMS (content management system), MariaDB is being used here (any database can be used – MySQL/PostGRES). Use the sudo apt install mariadb-server mariadb client command to install MariaDB, and then use sudo systemctl enable –now mariadb and sudo systemctl start mariadb commands to respectively enable and start it. Status can be checked with the systemctl status mariaDB command.
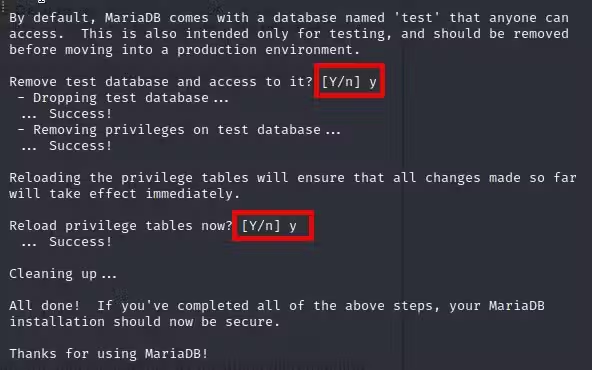
Also, to enable security within the installed database, use sudo mysql_secure_installation command to initiate the MySQL Secure Installation Wizard. The prompt will ask users to configure multiple security options.
- PHP and other essential extensions can be installed with the sudo apt install -y php php-common php-mysql php-xml php-xmlrpc php-curl php command, and the installed PHP version can be check with php –version command.
- Now to setup WordPress on Linux, use sudo apt install wget unzip command to install the necessary tools and then use wget https://wordpress.org/latest.zip command to download the latest WordPress version. With sudo unzip latest .zip command, extract the WordPress archive. Using cd wordpress command, navigate to the WordPress directory, copy WordPress files to the Web Server Directory with sudo cp -r * /var/www/html command, navigate to the directory using cd /var/www/html command, remove default index file with sudo rm -rf index.html command, and install additional PHP modules with sudo apt install php-mysql php-cgi php-cli php-gd -y command. By running the sudo systemctl restart apache2 command, restart Apache so that the changes can be successfully applied. Using sudo chown -R www-data:www- /var/www/ command, the ownership for the Apache server can be set.
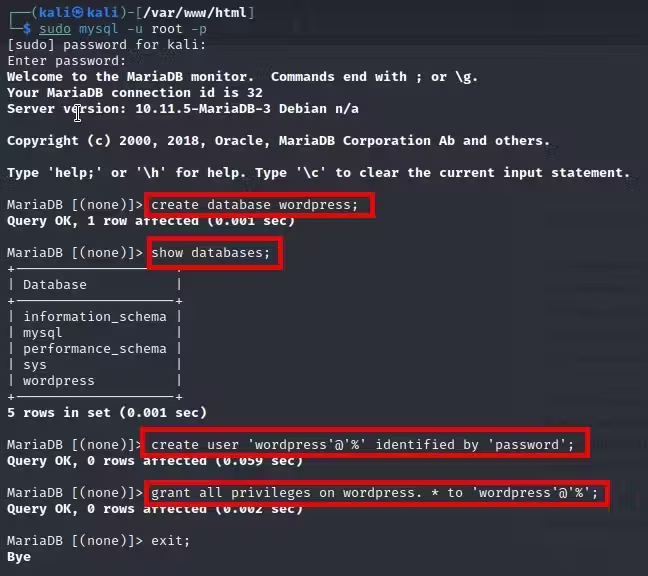
- To create a database for WordPress, login to the database server using sudo mysql -u root -p command, establish a dedicated database using create database new_DB; command, create a user account linked to the database using CREATE USER ‘new_user’@’%’ IDENTIFIED BY ‘your_password’ ;, and finally authorize the user with the GRANT ALL PRIVILEGES ON new_DB.* TO ‘new_user’@’%’; command. Also to add, new_user, new_DB, and your_password can be changed accordingly.
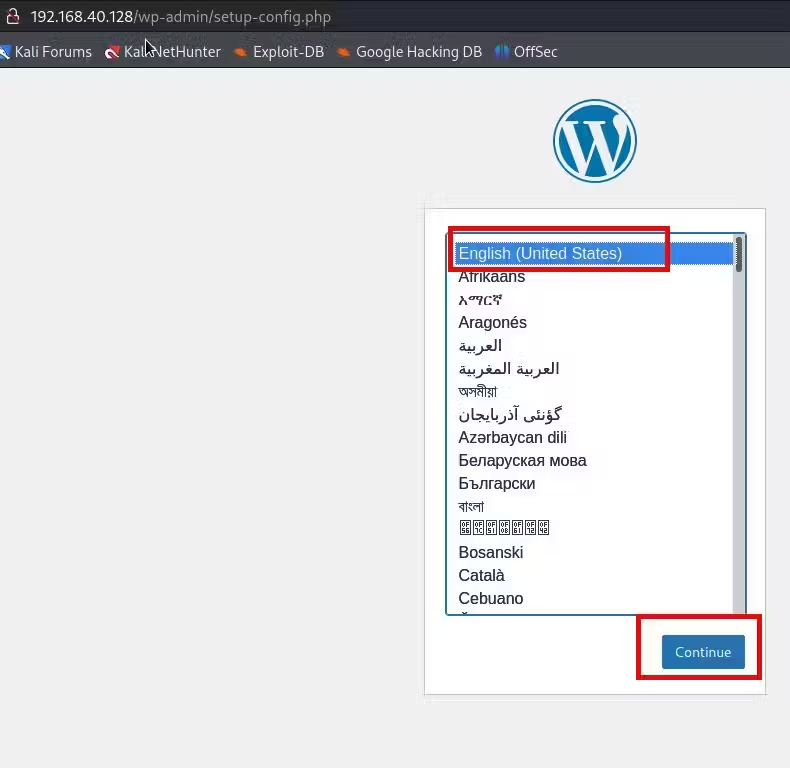
- For setting up the WordPress CMS Web Interface Setup, access the WordPress site on the browser and visit the endpoint (http://your-server-ip-address/wp-admin/setup-config.php). Next, add the IP address of the Linux server in place of your-server-ip-address. Then select the preferred language and click on Continue.
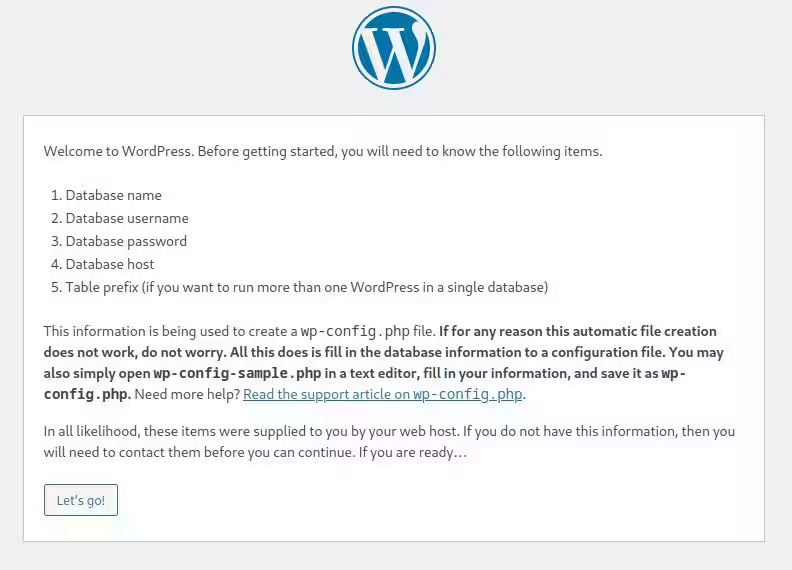
- To add database information to WordPress, click on Let’s go!
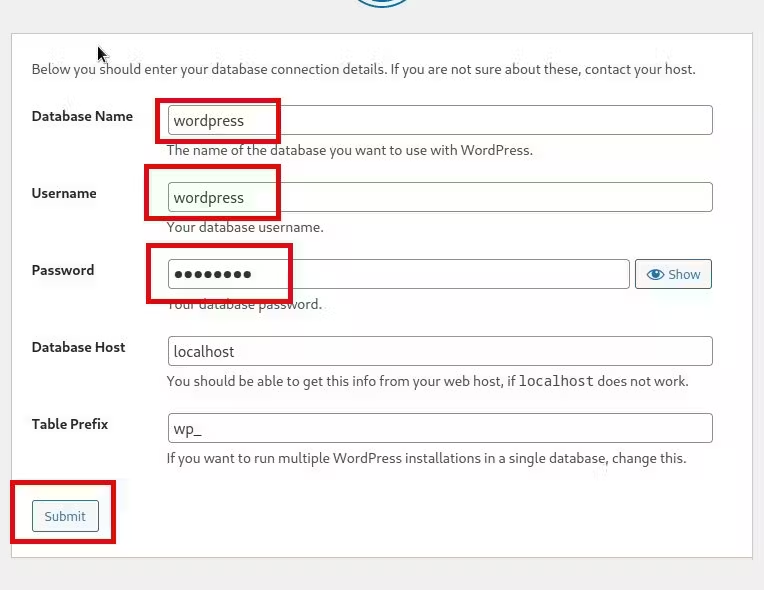
On the WordPress setup wizard, enter all the necessary credentials and click on Submit.
Click on Run the Installation to complete this process.
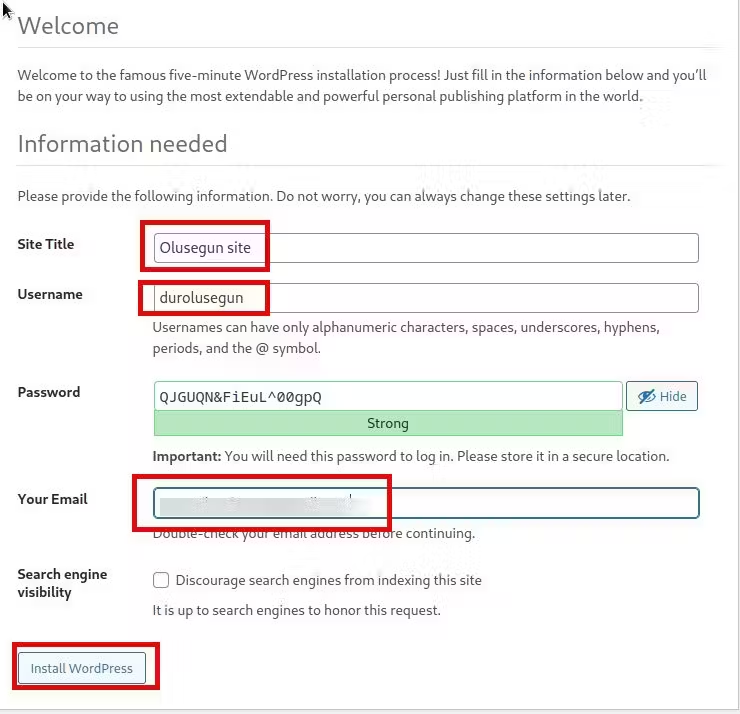
- Finally to create admin user and password, add site title, username, and password. Then press the Install WordPress button.
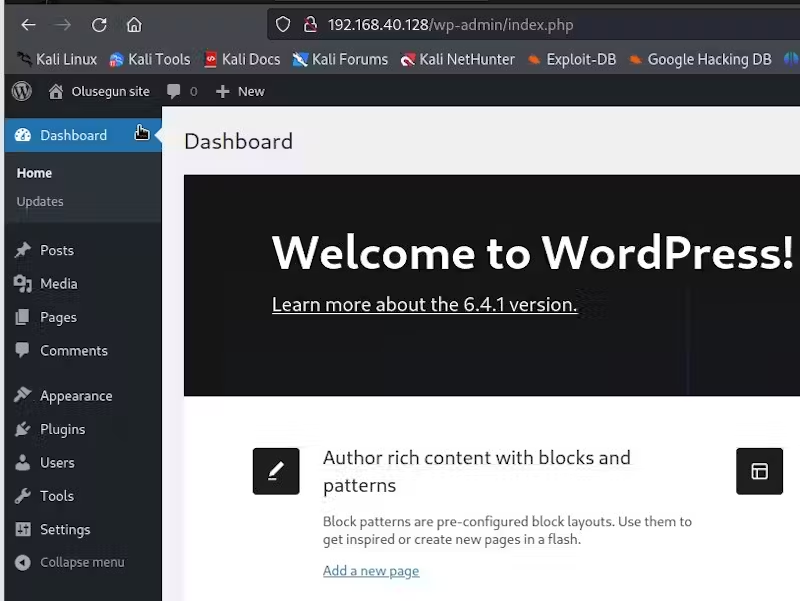
To get to the backend, make use of the created admin credentials.
Following these above mentioned steps, anyone will be able to easily install and run WordPress on the Linux server.
